Lesson 39 Easy 3D effect in Photoshop
Hello again. Today I want to look at an interesting and quite popular 3D effect that adds dynamics to photography. But then you will see everything for yourself. I'm sure people who love unusual types of processing will appreciate it.
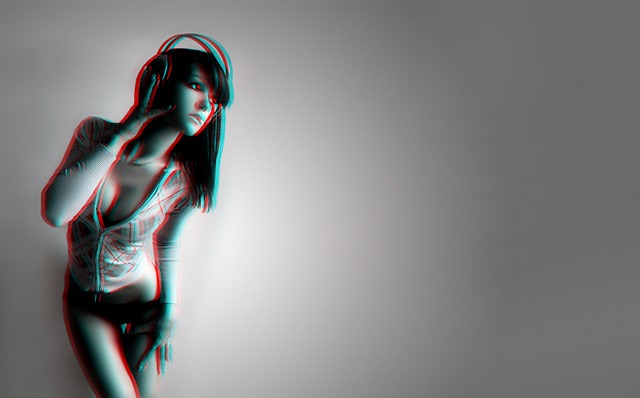
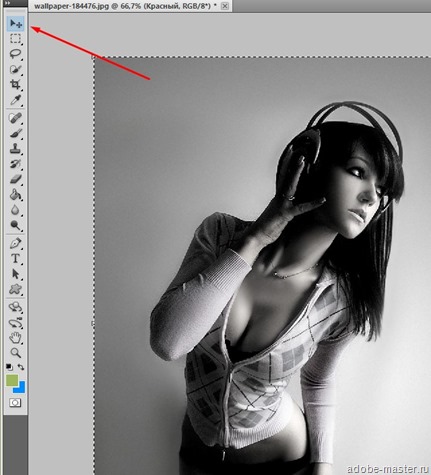
Well, are you ready? Open Photoshop and take some picture. For example, I took a b/w photograph of a girl. And I advise you to take b/w, because this effect looks as interesting as possible.
Let's not delay and get started right away. The lesson is easy, even very easy, so it will only take you 5 minutes.
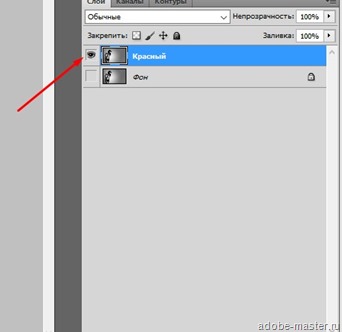
Step 1. We opened the picture, now we make a copy of our background using Ctrl+J. And for convenience, I advise you to rename it to "Red"(twice with the left mouse button on the name). And also hide the background. In the end it should look like this:
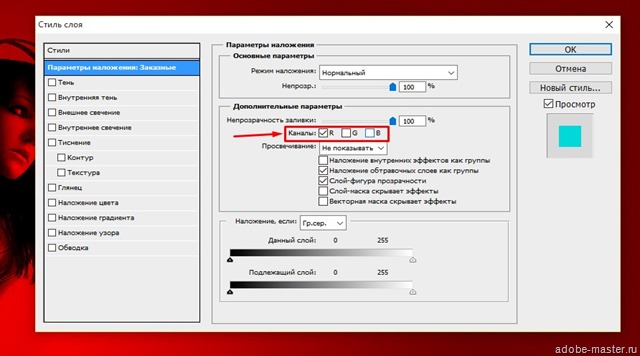
Step 2. Let's go to layer editing "Red". This can be done in two ways:
- Left-click twice on the layer (not by name, but by layer!).
- Or like this - .
And leave a tick only on “R” (Red).
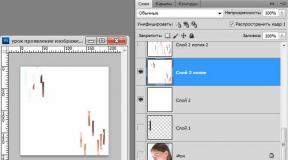
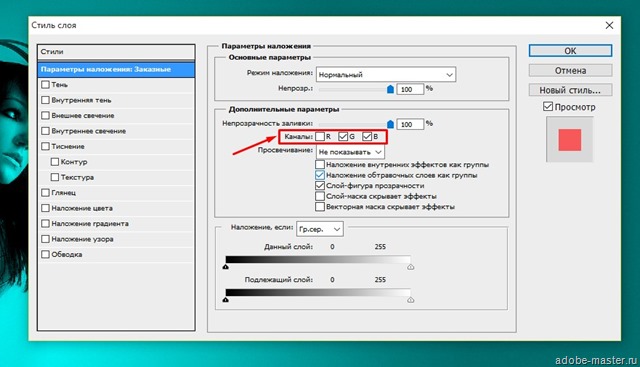
Step 3. Again, create a copy and give it a name "Blue" and hide the layer "Red". Go to settings and leave only “G” (Green) And “B” (Blue).
We also make two layers visible "Blue" And "Red".
Step 4. And now the finale and the most interesting part. Clamp Ctrl and left-click on the layer thumbnail and now use the tool “Moving.”
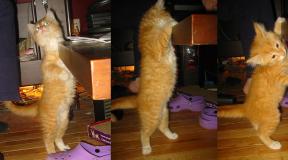
And arrows move the layer to the right. Not much to roughly get the final result (see below). Here it is according to your taste.
We do the same with the layer "Blue", just move it to the left.
And we make the original background visible. This is necessary in order to get rid of colored edges.