How to sharpen a photo
Photo sharpness is one of the most common problems that new photographers face. The reasons for decreased sharpness can be very diverse: errors in focusing, incorrect exposure, poor quality of the lens. In this article we will talk about how to solve the problem of photo image sharpness.
The human eye perceives the sharpness of a frame, first of all, as the degree of contrast in the contours. In this regard, ensuring image sharpness is achieved by increasing the contrast on the contours, that is, darkening the contour in a dark area and, accordingly, lightening it in a light area. The clarity and sharpness of the image largely depend on the resolution of the digital camera’s matrix and the sharpness quality of the lens, but these parameters, unfortunately, cannot be changed. However, in most cases, the cause of a blurry photo is simple mistakes by the photographer, not the photography equipment he or she is using.
To ensure the sharpness of your frame while shooting, you need to focus your attention on several things. Firstly, on the operation of the autofocus (AF) system. You should use the correct focus mode according to the shooting conditions. If you are unable to get a clear, sharp shot, it is better to use manual focusing. When manually focusing, the built-in LiveView mode (if your camera has it) can be a useful tool. Just turn on LiveView mode, zoom in on the subject you are focusing on, and check the sharpness of the frame on the LCD display.
In addition to the operation of the autofocus system, one of the main factors affecting the sharpness of a photograph is the aperture value. It is worth keeping in mind here that all lenses have their own optimal aperture value, at which they are able to produce the sharpest image. Typically, the optimal aperture value for a lens is within two numbers of its maximum aperture (for example, with a maximum aperture of f/4, a value between f/5.6 and f/8 would be optimal). This aperture value can be determined experimentally by photographing the same object at different aperture values, and then comparing the sharpness of the resulting images on a large computer monitor. To ensure sharp and clear photo images, do not forget to also use a tripod, or try to always find a reliable support for the camera while shooting.
But what if the photos still turn out blurry or not sharp enough? You can adjust the sharpness of finished photographs using various software tools on your computer. The most commonly used program in this case is Adobe Photoshop, although there are many other software products that allow you to correct images. Using Photoshop as an example, we will look at how you can sharpen a frame.
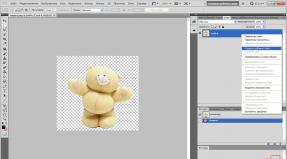
Original image (all images are clickable)
To do this, the program uses various filters, that is, special pixel processing algorithms applied to the entire image or part of it. Photoshop filters can be ready-made (automatic) or customizable. Ready-made filters are the easiest way to sharpen a photo; moreover, they do not require any special skills in working with the program. You only need to find the Filter option, which gives access to a group of ready-made Sharpen filters. There are three automatic filters in total:
- Sharpen. This filter makes the image slightly sharper by enhancing the difference in color between pixels.
- Sharpen More – A stronger increase in sharpening compared to the previous filter.
- Sharpen Edges – thanks to this filter, you can make the edges of a photo image clearer and sharper, while the rest of the image remains blurry.

The above-mentioned filters are very convenient because they work in a “one-click” method, but they do not have any settings, so the result of their use may not meet your expectations. To achieve better image processing results, it is recommended to use custom filters. Perhaps the most popular of these is the Unsharp Mask filter, which finds the edges of image details, making their outlines sharper by brightening the light pixels along the edges of various details and darkening the dark pixels.

In order to use this filter, you need to go to the menu Filter – Sharpen – UnsharpMask. Here you will have access to three filter settings with which you can adjust the sharpness of the photo:
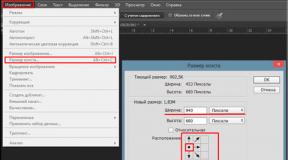
- Amount (amount/effect) – this parameter determines the “strength” of sharpness or the degree of influence. It is usually recommended to choose a value in the region of 150 – 200%.
- Radius - The size of the details or area of the photo image to which the filter will be applied. The optimal radius value for most photographic images is 0.2 - 0.3, but in general the recommended range is from 1 to 4.
- Threshold - This setting determines how much different adjacent areas must be in order for the boundary between them to be considered a contour. At a threshold of 0, all pixels will participate in the operation to change the contrast, and at a threshold of 255, the image will not change. It is better to leave this parameter at zero.

By changing these three settings, you can adjust the sharpness of a photo or a specific area.
Another convenient filter with a settings window is the so-called “smart” sharpness (Smart Sharpen). This filter provides access to two tabs Basic (Simple) and Advanced (Advanced), and the parameters of both are the same - you can change the value of Amount (Sharpness) and Radius (Radius). By freely moving the sliders, you can sharpen the frame, seeing the results of your actions on the sample.

Compared to the Unsharp Mask, the Smart Sharpen filter is better suited for correcting images with a lot of fine detail, and it gives you more control over sharpening. In Basic mode, the filter is not much different from Unsharp Mask, but there is a Remove option, with which you can choose one of the methods for removing blur (for example, using LensBlur (Depth of Field) you can increase the depth of field).
In the Advanced tab there are two more additional settings - Shadows (Shadows) and Highlight (Light), each of which has three parameters. These settings allow you to simply move the sliders to adjust blur in the highlights and shadows of the frame, eliminate unpleasant white halos, and also increase/decrease the effect of the selected option.

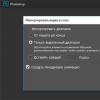
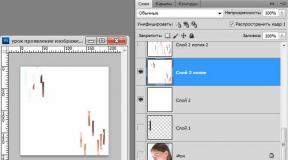
You can also sharpen your photo using the HighPass filter. But to do this, you must first open the original photo image, duplicate the layer twice, so that you end up with three layers. Apply the Other/HighPass filter to the top layer and select the radius you need (Radius) - it is identical to the radius parameter in the Unsharp Mask filter. We also apply the Overlay blending mode to this layer, after which the sharpness of the picture will increase significantly even in those areas where it was not particularly necessary. Excessive sharpness in certain areas can be smoothed out with an eraser. Next, use the Ctrl+E key to connect the top and central layers. You can watch a detailed lesson on using the HighPass filter.
So, there are a sufficient number of ways to sharpen in Photoshop. In addition to the above-mentioned filters, there are also special plugins for Photoshop that can increase sharpness using various algorithms. If you do not have the skills to work with graphic editors, then you can simply use ready-made filters, where you only need to click on the mouse button. For more advanced users, Unsharp Mask, Smart Sharpen and High Pass filters are available with additional settings. However, as practice shows, the most optimal results are achieved not by applying one filter to the entire image, but by using different filters with different settings for certain areas of the photo.