Make voluminous text in Photoshop
In this tutorial you will learn how to create glossy 3D text in Photoshop.
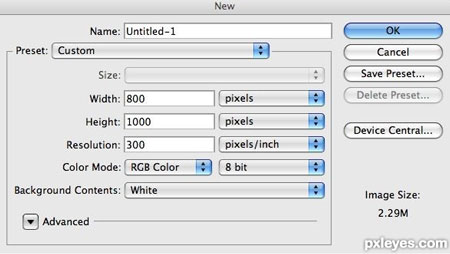
Step 1. We create a document measuring 800x1000 pixels with a resolution of 300 dpi. There are three reasons why we chose such a large document size.
Firstly, when you create something in Photoshop and then import it into a project, you may need to adjust the size of the image, and if the source material is small, then when enlarged it may lose a lot of quality.
Secondly, when working with large images, we can pay more attention to small details.
Thirdly, we have more free space to work.
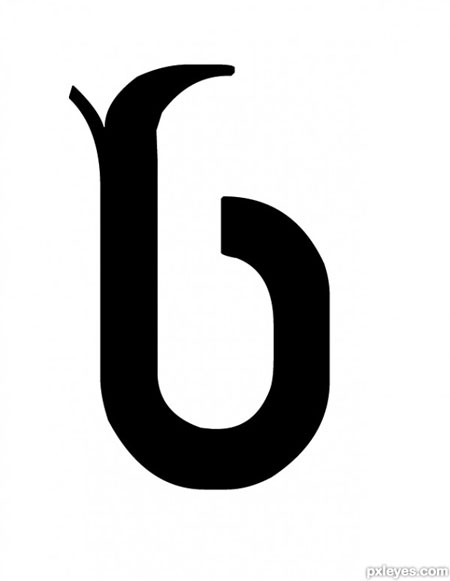
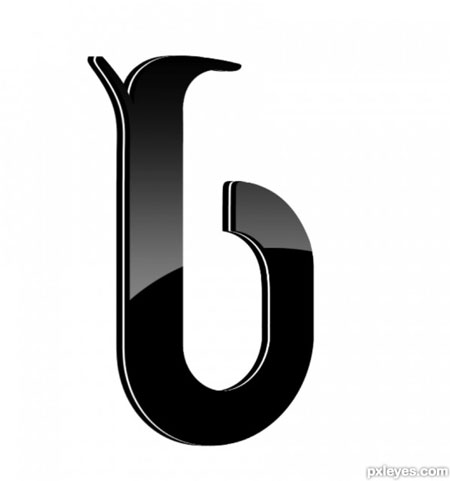
Step 2. The first thing we have to do is create a letter. I decided to use the Defeqto font from www.dafont.com.
I'll work with the letter B, but you can use any other. It seems to me that the glossy effect will look better with this font.
Right-click on the letter and select Rasterize Type(Rasterize text). This will give us the opportunity to edit it.
Step 3.(in this step we will tidy up the letter if necessary, of course. You can skip this part and go straight to Step 6)
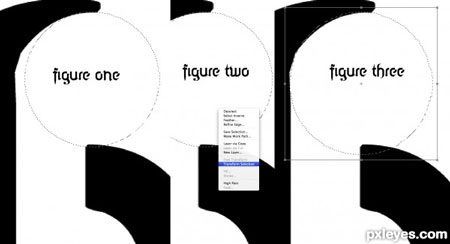
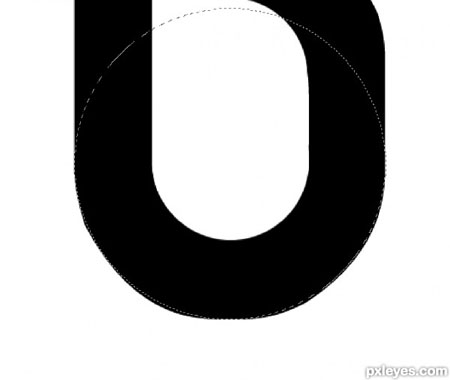
The edges of the font are a little rough, let's fix that. Activate Elliptical Marquee Tool(Oval highlight) (M). Hold SHIFT and create a selection so that it follows the shape of the top of the letter. As you can see in the figure below, the position of the selection is not entirely correct, so right-click on the selection and select Transform Selection(Transform Selection). We adjust the positions as shown in the screenshot. Then just click DELETE to delete the selected part. Thanks to this, the outline of the letter became smooth, just as we wanted.
Step 4. We also need to correct the outer edges, for this we create a selection as in the previous step and invert it SHIFT+CTRL+I. Then we take Eraser Tool(Eraser) (E) with Opacity (Opacity) and Flow (Pressure) at 100%. Erase the extra edges.
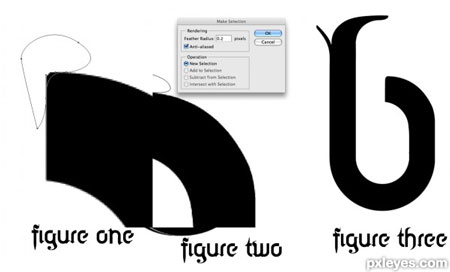
Step 5. Activate the tool Pen Tool(Pen) (P) and create a smooth curve at the corner of the letter, as shown in figure 1. Right-click and select Make Selection(Create a selection). Make sure the Feather parameter is set to 0.2 pixels. Don't leave the corners too hard or make them too rounded. We apply these actions to other parts of the letter that need correction. Figure 3 shows what happened in the end.
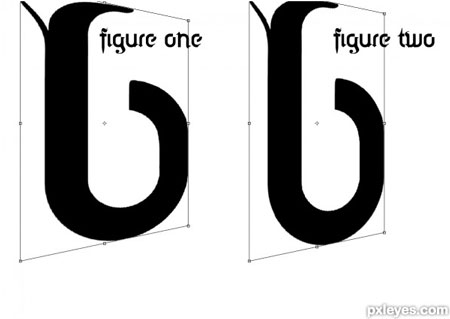
Step 6. We have come to the part of the tutorial in which we will create a 3D effect with a neon glow. Let's move on Edit - Transform - Free Transform(Editing - Transform - Free Transform) (CTRL+T). Holding SHIFT+ALT+CTRL, pull the right corner down to deform the letter in perspective (figure 1). Then we pull one of the side knots towards the center, as in figure 2.
Step 7 Now let's give the text some dimension. Take the tool Move Tool(Move) (V), activate the layer with the letter, hold down the keys CTRL+ALT and, with a double arrow appearing, move the letter to the right 18 times to create 18 copies. After that, hold down CTRL and select copies of 8, 9 and 10, then combine them with the combination CTRL+E. Let's call this layer "GLOW". Next, apply to it (Image - Correction - Hue / Saturation) (CTRL + U). Set the Lightness parameter to maximum.
Step 8 Then select copies 11-17 and merge them (CTRL+E), calling the layer “FRONT”. Now select copies 1-7 along with the original and also merge them. Name the layer "BACK". Then select copy 18 and rename it “DESIGN”.
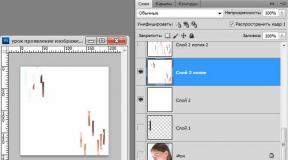
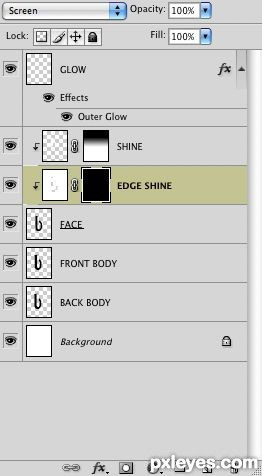
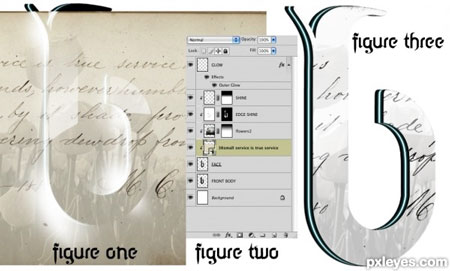
Step 9 Create a new layer "SHINE" above the "DESIGN" layer. Then, hold down the ALT key and click between these two layers. As a result, a small downward arrow should appear near the “SHINE” layer, which means that a clipping mask is being applied for this. Activate Rectangular Marquee Tool(Rectangular selection) (M), create a selection of the ENTIRE letter and fill it with white Edit - Fill(Editing - Fill). Next we take Elliptical Marquee Tool(Oval selection) (M) and select the bottom part of the letter, as shown in figure 2. Press the key DELETE to delete the selected part, as shown in Figure 3. Now let's create a layer mask. You can do this by clicking on the small rectangle with a circle inside at the bottom of the layers panel Add layer mask(Add a layer mask). Activate the mask by clicking on the second white rectangle on the “SHINE” layer.

Let's take it Gradient Tool(Gradient) (G) from black to white, linear, deactivate the Reverse option if it is active. Draw a gradient from the top to the bottom of the document and reduce the Opacity of the “SHINE” layer by about 50-60%. Make sure your letter looks like mine.
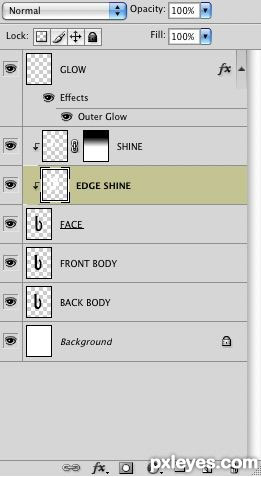
Step 11 We want the white line in the center to glow, but first we'll get rid of the part of the layer that we can't see. Holding CTRL, click on the thumbnail of the “FRONT PART” layer. You have to click on the thumbnail because we need to load the layer selection. After that, go to the “GLOW” layer (just click on it) and press DELETE. Hide the "FRONT" and "DESIGN" layers and you will see the result of these manipulations. Deselecting CTRL+D. Now move the “GLOW” layer to the very top of the layers panel. After that, select the “FRONT” and “BACK” layers and merge them together (CTRL+E). Name the new layer "BODY".
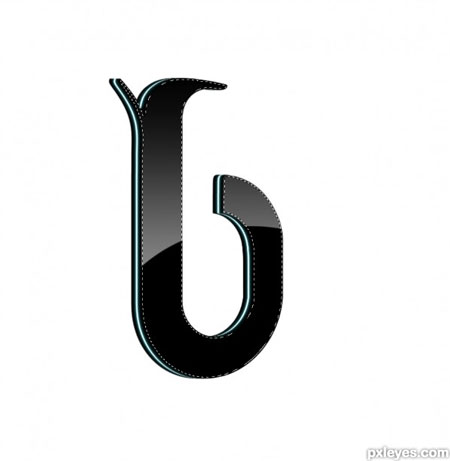
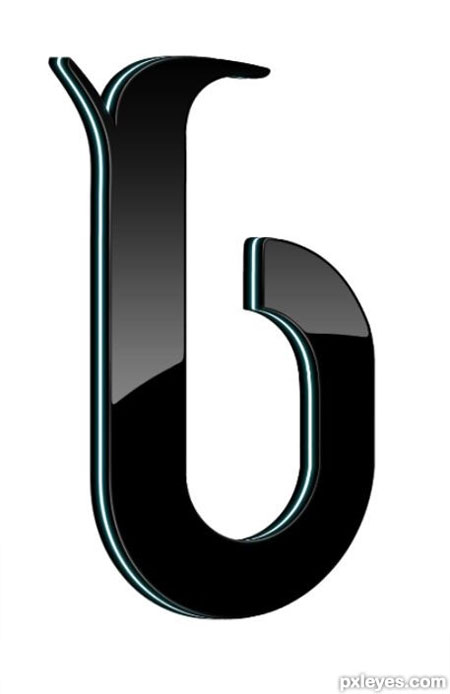
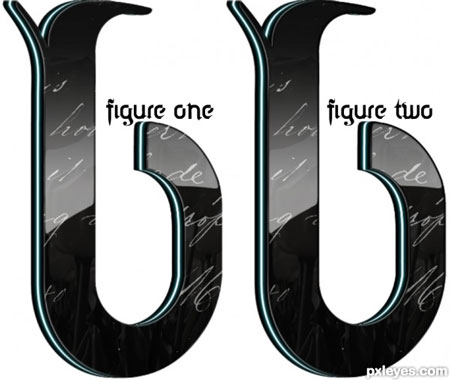
Step 12 Activate the “GLOW” layer and click on the “fx” button at the bottom of the layers panel and select Outer Glow. I want the glow to be turquoise. Set the glow size to 6 and color to 00E1F5.

Step 13 Now let's make the corners of the letter smoother. To do this, load the selection of the “DESIGN” layer. Let's move on Select - Modify - Contract(Select - Modify - Compress). Enter 2 pixels, then invert the selection SHIFT+CTRL+I. Before we continue, make sure the "SHINE" layer is active. Now press DELETE to delete the extra part.

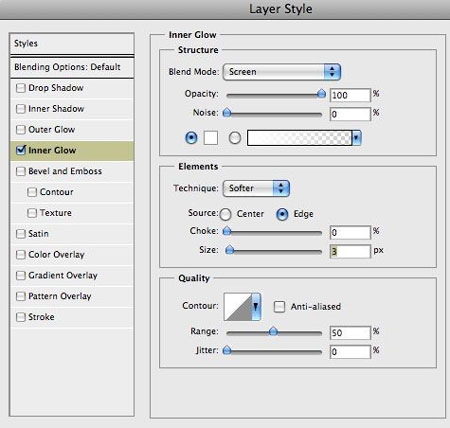
Step 15 Activate the "DESIGN" layer and click on the "fx" button at the bottom of the layers panel. Select from the menu Inner Glow(Inner glow).
Step 16 Click on the "fx" button again and select Create layers(Create layers), click in the pop-up window OK. The inner glow layer style is now on a separate layer. Rename it to “GLOW EDGES”. Make sure your layers look the same as mine.
Step 17 Create a layer mask for the “EDGE GLOW” layer and click CTRL+I to change its color to black. Make sure your layers panel looks the same.
Step 18 Let's take it brush(B) medium hard white color about 100 pixels in size Opacity(Opacity) at 100% and Flow (Press) at 15%. Make sure the Foreground and Background colors are set to black and white respectively, if they are not then press the key D. To quickly change the color from black to white, press the key X. Click the brush in those places where the white border should be visible. You can also experiment with the brush settings. Do this only on areas where there are rounded edges, and very little on hard edges, as shown in the figure below. Remember that the glow must have a light source, and since I made the letter a little unfolded, the light will fall from the left side. Don't make all the corners glow as it will look unrealistic.
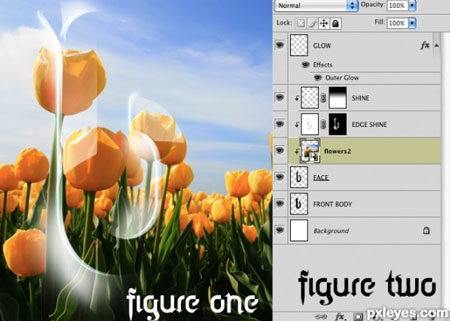
Step 19 Now we need to add some reflections. Activate the "DESIGN" layer and go to File - Place(File - Place) and select any image, preferably high resolution. I used a photo of flowers. Then place a new layer as shown in figure 2.
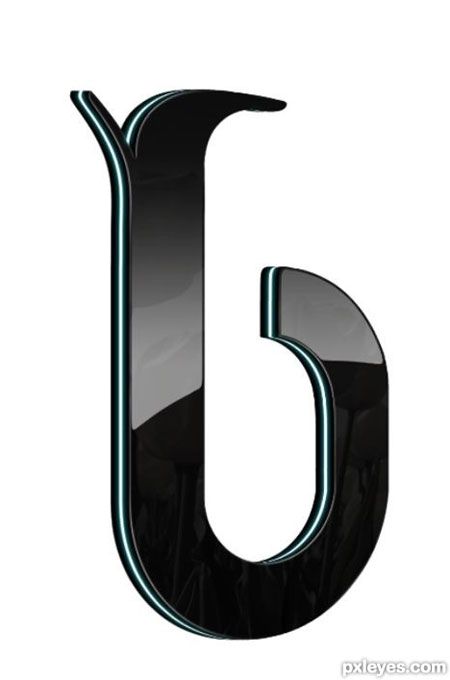
Step 20. If the image has been converted to a smart object, right-click on it and select Rasterize Layer(Rasterize layer). Now we can edit this layer. Next we need to open the window Hue/Saturation(Hue/Saturation). Image - Adjustments - Hue/Saturation(Image - Adjustments - Hue/Saturation) or CTRL+U. Reduce Saturation to about -95% or -90% and click OK. Now reduce the Opacity to 20-25%.

Step 21 Let's create a layer mask for the image you decided to use as a reflection. After that we use Gradient Tool(Gradient) (G) the same way we did in Step 10, but this time draw a gradient across the top of the letter so that the mask is not completely removed.
Step 22 We can leave it at that, but you can continue to add more details.
Now we'll add a nice little effect. I used handwritten text from a book I scanned. We import it into the working document via File - Place(File - Place). If the image becomes smart object, rasterize it. Place the image as shown in Figure 1. Completely desaturate the image with the text SHIFT+CTRL+U. Now you need to apply Levels(Levels) (CTRL+L) so that only black and white remain. We don't need shades of gray, so we open the levels Image - Adjustments - Levels(Image - Correction - Levels) and move the Highlights slider to the right and the Shadows slider to the left until only black and white remain in the image, as shown in figure 3. Set the layer blending mode to Screen(Lightening). Then we reduce Opacity(Opacity) up to 70%.
Step 23 Let's continue working on the text layer. Load the selection of the "DESIGN" layer and compress it by 2 pixels, as we did before using Select - Modify - Contract(Select - Modify - Compress). Then Select - Modify - Feather(Select - Modify - Feather), enter 1 pixel. Invert the selection Select - Inverse(Select - Invert) (SHIFT+CTRL+I) and double-click DELETE. With the selection still active, select the layer with the image we used for the reflection (the one with the flowers) and press DELETE twice again. Compare figure 1 and figure 2.
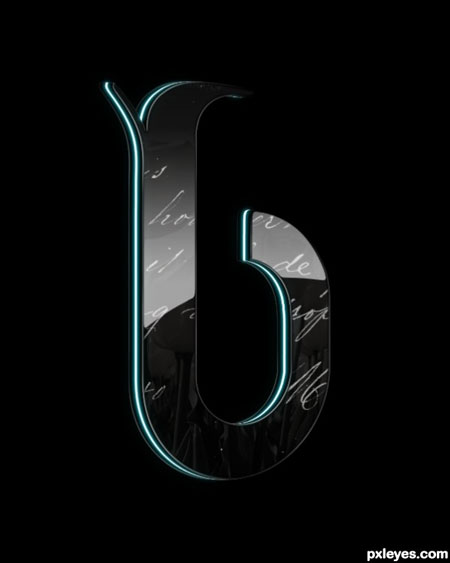
Step 24 The rest is up to you! The letter looks good on a black background! If you choose a dark background, you will need to add a glow to the black areas like I did. Repeat Steps 15-17, but this time apply everything to the "BODY" layer.