How to make a gold color in Photoshop?
Photoshop includes tools that allow you to design images and their individual elements in various color shades. Among the most popular in modern design are gold ones. What are the main capabilities of Photoshop in terms of applying these shades? How to make a gold color in Photoshop?
There are a huge number of options for using the corresponding shades in the graphic editor in question. But if you study the basic principles of using such Photoshop capabilities, you will subsequently be able to successfully use most of the program’s “golden” tools.
Let's study these principles in the context of processing two main multimedia elements that are edited in Photoshop:
- images;
- texts.
Let's start with the first point.
How to make gold color for images in Photoshop?
Digital images on most modern computers are constructed by combining three primary colors: red, green and blue. Thus, by changing their intensity and relative position in the structure of the picture, you can “recolor” the image from one color to almost any other. In particular - in gold. Photoshop includes tools that allow you to do this.
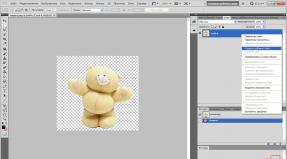
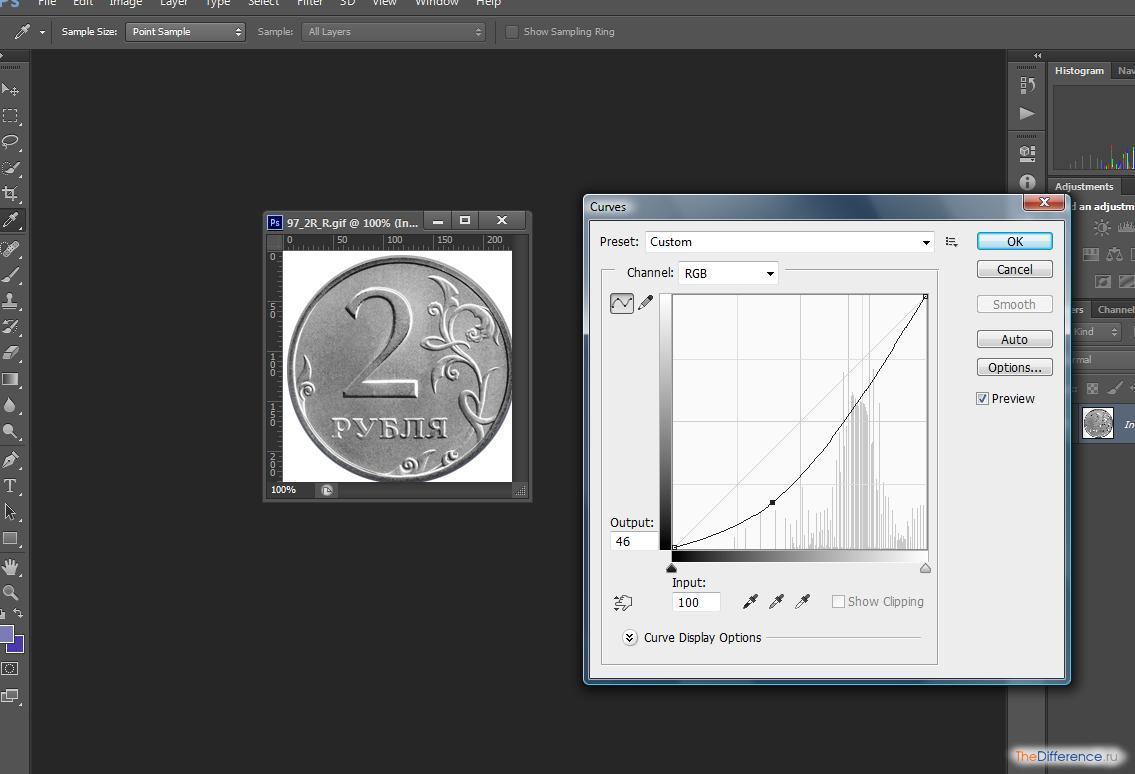
Let's consider how you can “repaint” a silver coin - for example, 2 Russian rubles - in gold.
We launch Photoshop - we agree that it will be version CS6, one of the most popular in Russia and in the world, with an English interface. Next, open the file with the image of the coin. You can, for example, download one of those available on the website of the Central Bank of the Russian Federation - follow the link. On this page, the image of the 2-ruble coin is probably presented in the most natural form, without any unnecessary inclusions.
It should be noted that the image from the website of the Central Bank of the Russian Federation is especially convenient to process because it is presented in GIF format with a transparent background layer. This allows Photoshop - particularly the CS6 version - to easily recognize the actual outline of the coin. When “repainting”, in this way, only its image will change - the background will not be adjusted.
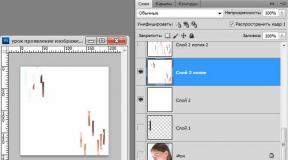
You can immediately proceed to the process of giving the 2-ruble coin a gold color. This is done using the Curves tool, which allows you to adjust the combination of red, green, blue, as well as the RGB spectrum - in order to adjust the brightness of the image. To open this option, you need to select the Image menu item, then Adjustments, then Curves.
To begin with, you can slightly darken the coin by moving the black RGB curve back a little - something like in the screenshot.
After that, we move on to adjusting the red, green and blue colors. In order to “repaint” a coin in gold or a similar color, the curves should look something like this:
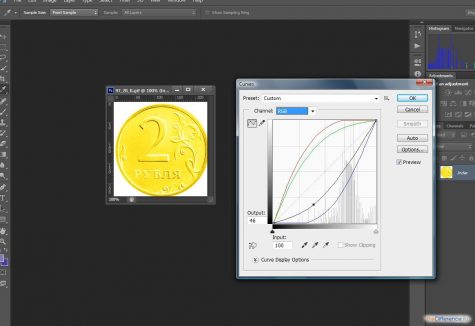
By changing their position in one way or another, you can adjust the golden shade based on its optimal adaptation to the specifics of the project.
Instead of a coin, there can be any other graphic object. In particular, the text. In order to make it gold, you will need to use some additional effects provided by Photoshop.
How to make gold color in Photoshop for text?
Let's create a new project in Photoshop and place some text on it. You can make it gray - later we will, one way or another, “repaint” it.
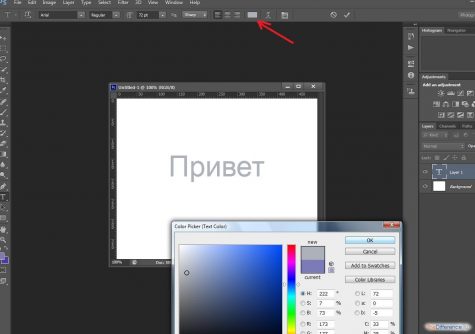
The next necessary step is rasterizing the text. This procedure involves reformatting it from a “letter” format to a graphic one. This will allow you to apply any Photoshop effects to the corresponding element of the picture. Rasterizing text is simple - you need to select the Rectangular Marquee Tool, then right-click on the text and select Rasterize Layer.
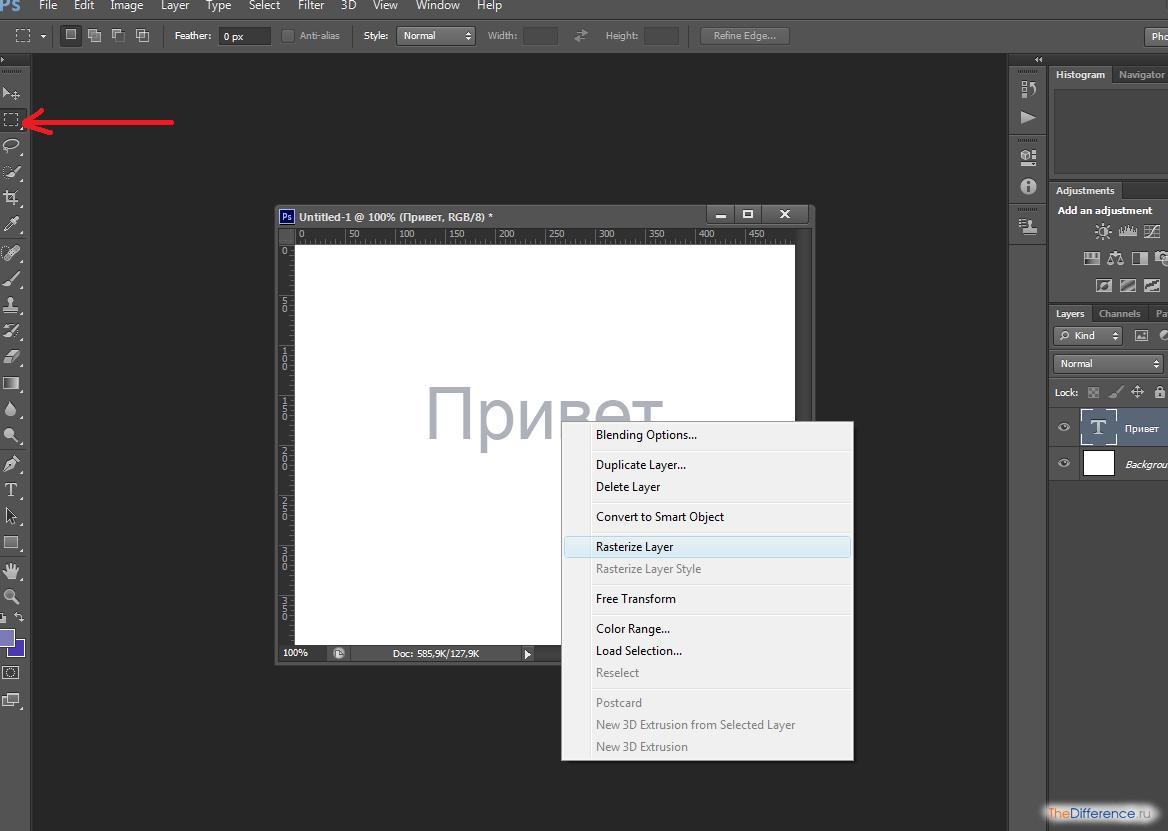
An important nuance: after rasterization, the text cannot be adjusted. Therefore, before carrying out this procedure, you need to make sure that it is in the final version. Or save a copy of the project in PSD format, in which the text is not rasterized, in order to correct it later if necessary.
Next, it will be useful to give the letters, turned into an image through rasterization, a gradient effect. To do this, you need to right-click on the corresponding layer, then select Blending Options and edit the parameters on the Bevel & Emboss tab (approximately as in the screenshot).
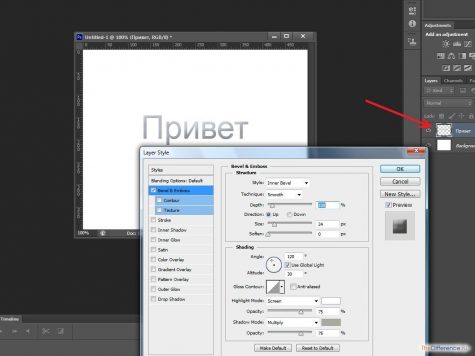
As a result, the text will take on a gray gradient - somewhat similar to what is present in the image of the silver 2-ruble coin.
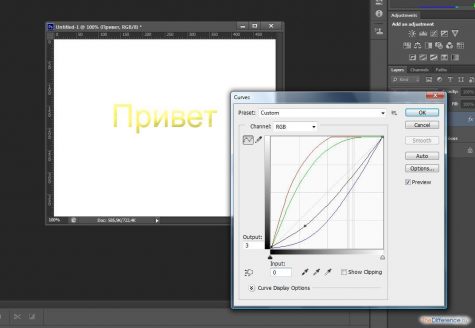
After this, you can use the already familiar Curves tool to give the text a golden tint by adjusting the red, green and blue spectra.
Using the Photoshop options we examined, you can “golden” almost any image.