How to make 3D text in Photoshop
In this lesson we will look at the basic tools of Photoshop for working with 3D objects, namely text.
In Photoshop, you can easily simulate a beautiful 3D inscription, for example, for a logo for a website or group on a social network. Three-dimensional text in Photoshop is created much easier than in 3D editors, so let's get started!
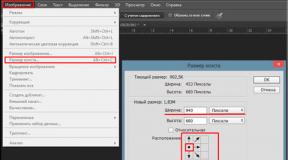
1) Let's create a new document of the size you need, I set the square size to 1024 by 1024 pixels. To do this, in the top menu on the left, select “File” - “Create” and set the necessary parameters. If you are not an experienced Photoshop user, then I recommend not changing anything, leaving all parameters at default, except for the document size.
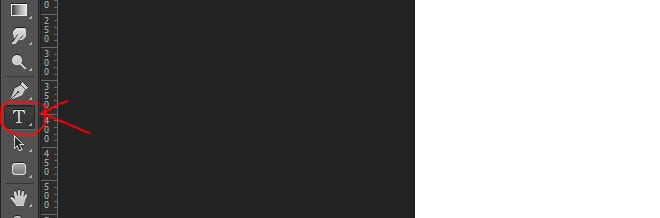
2) Now let's write the text, which we will later make three-dimensional. To do this, in the left side menu of the program, select the “Text” tool by clicking on it with the left mouse button.
Now, having selected the required tool, left-click on our canvas and print the required text. To adjust the text size, font, color, etc., you need to select the “Symbol” tab in the panel on the right side.
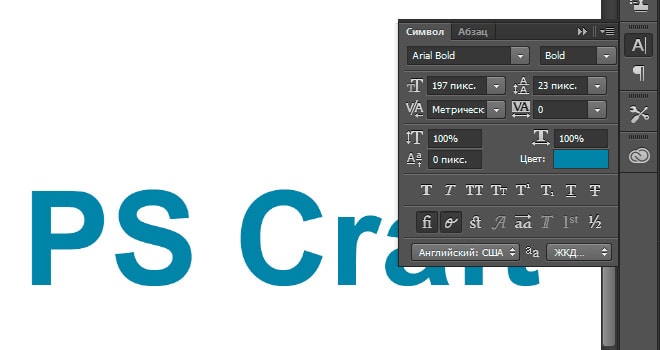
If this tab is not displayed for you, then you need to enable it by selecting “Window” - “Symbol” in the top menu of the program. There should be a checkmark to the left of the “Symbol” item, which means this item is enabled. If there is no checkmark, just left-click on this item.
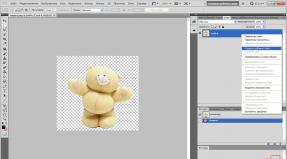
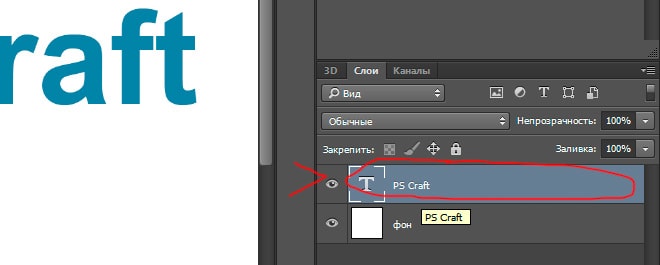
3) And so, we printed the text we needed, adjusted its size, color, selected a font, and now we convert it into a three-dimensional 3D model. To do this, in the top menu of the program, select the item “3D” - “New 3D - extrusion from the selected layer” and in the pop-up window simply click “OK”.
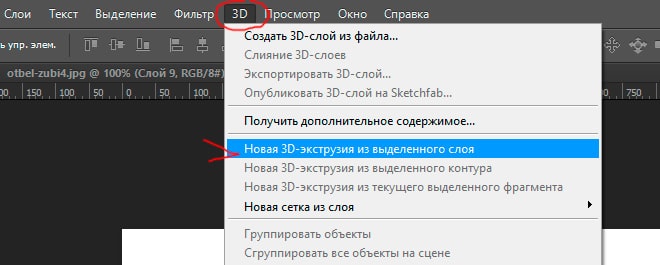
In this case, the layer with the text in the right panel below should be selected; if another layer is selected, then left-click on the layer with the text to select it.
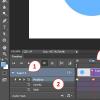
4) Having completed all the steps described above, we find ourselves in the 3D editing mode of our text. You can rotate and move text in any direction using the 3 axes by selecting the one you want and holding down the left mouse button. You can also arbitrarily select the angle of the text; to do this, move the mouse outside the text (preferably above it), press the left mouse button and, while holding it, move the mouse.
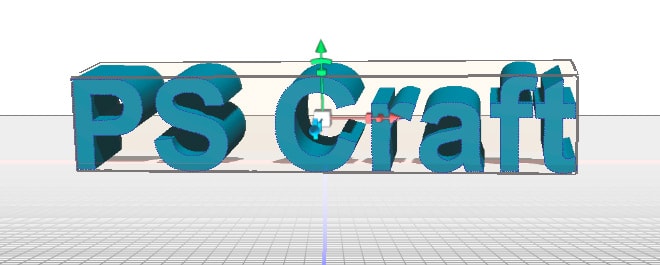
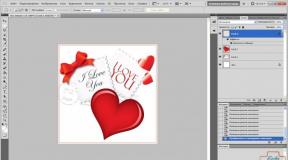
5) When working in 3D editing mode, the settings panel in the upper right part of the program becomes available to us. Using this panel, you can configure various effects for our text; try changing something by moving the settings sliders in this panel. By experimenting with these settings, you can get an unusual and interesting result.
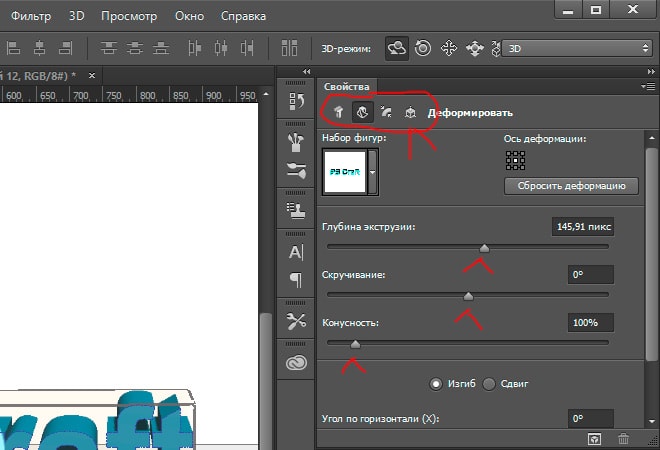
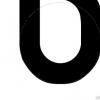
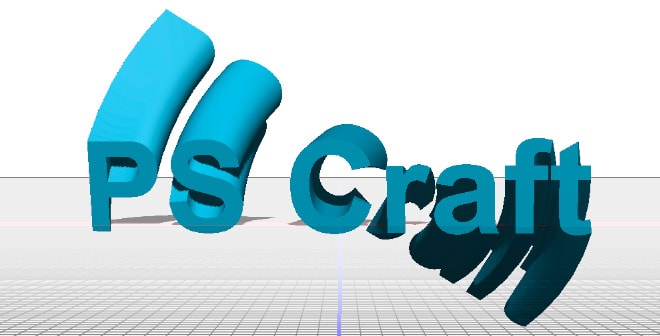
For example, by adjusting the “Twist” setting slider, I got this interesting effect:
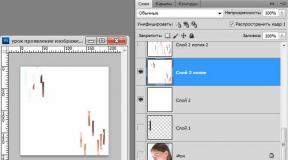
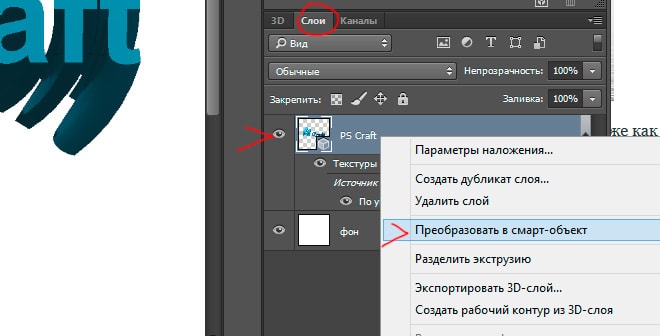
6) Having created the text you need with effects and the desired angle, you can convert it into a “Smart Object” and work with it as with a regular layer, and not with a 3D object. To do this, in the lower right panel, go from the "3D" tab to the "Layers" tab and select the text layer, right-click on it and select "Convert to Smart Object". But keep in mind that after converting the text to a Smart Object, you will no longer be able to edit it, i.e. change the text of the inscription itself, change the font, change 3D effects, etc., so this action is best done after finishing the work.
7) If you want to make the inscription, say, half curled, and the second part of the inscription simply voluminous and turned sideways, then accordingly, initially you need to create two different layers in each of which will be part of this inscription and work with each of the layers separately, editing part of the inscription.